A Country Walk

Living Life in The Country

Archive for the category “Crafts and Projects”

My Mini Projects!

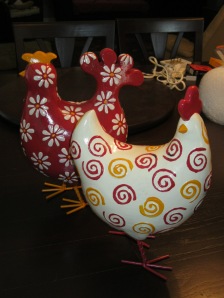
After removing our broke down canopy by the pool, I was left with a couple of galvanized tin buckets.  I started to imagine what I could do with them and ultimately decided to plant herbs in them.  They looked anything but presentable after three seasons of exposure to the elements, so I decide they needed a makeover.  I couldn’t decide on a motif for my repurposed buckets and batted around several ideas before settling on stripes and flowers.  I had just finished repainting my resin chickens that had been pretty beat up after falling off the deck railing and getting chipped.  The colors on the chickens was not really attractive so I took this opportunity to refinish them in a more pleasing palette of colors.  I painted them in deep red, cream and tangerine yellow-orange.  They already had raised designs on them so I incorporated that into my design and alternated the color scheme to make them different from each other but still matching.  They turned out great so I thought why not use the same technique on my repurposed buckets.

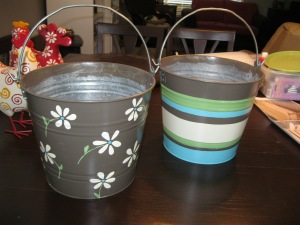
I painted one with alternating stripes in turquoise, chocolate-brown, cream and lime green.  The second bucket got the same color scheme but I chose random daisy-like flowers to incorporate my colors on the chocolate background.  They turned out great and hubby thankfully helped give them a good coat of poly sealer to protect them from the elements better.  I am now hooked on this painting in themes and have searched my house over looking for the next item to decorate.  I have a Buddha who needs some TLC.  I wonder what theme I should choose for him!

My colorful outdoor chicken statues…reborn!

Fred and Ethel

Fred and Ethel

My “new” and “improved” farm buckets!

The buckets...part Deux!

The buckets…part Deux!


Another Fantastic Project by Tyler!

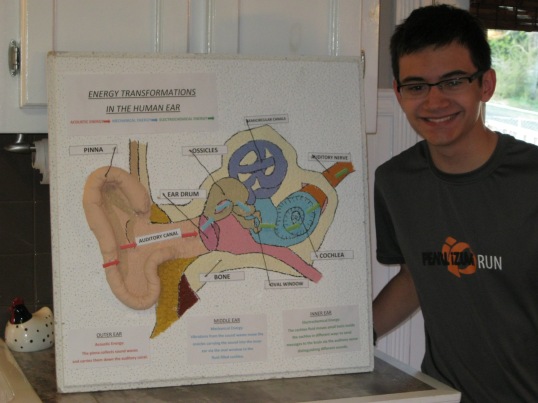
Last Thursday, Tyler came over so I could help him with his physics project.  I have a vast assortment of art supplies including paint, brushes, markers, bubble wrap and other various necessities he needed to finish his project.  His assignment was to trace the path of three energy transformations.  He considered solar energy, coal energy and even wind energy, but his final choice was to explore the energy transformations in the human ear.  I couldn’t have been happier with his choice…so smart!  He is a perfectionist like myself and he worked so hard to make the project unique and easy to understand.  After some trial and error, he had completed a one-of-a-kind project that I was sure he would score high marks on.  Of course, I can’t resist making a few pics to commemorate his achievement.  He hasn’t gotten his grade yet but I am convinced it will be an A plus!  After all, his teacher sent out an email to show all the other science professors his great work.  So proud of you, Tyler!

Here is another fantastic project by Tyler D. for his physics class.

Energy Transformations in the Human Ear

Energy Transformations in the Human Ear

Best $ Ever Spent on My Stinky Boys

I came up with yet another project my beloved G. A cat “room” so that the boys and Salem could literally go outside to potty with the safety of a confined room to prevent escape by them and break-ins by the outside boys and miscellaneous critters that stop by on occasion. So my plan started with a few hours on the net trying to get ideas for my “Potty Room”. Most ideas revolved around indoor rooms like extra bedrooms or spare bathrooms which is what we are working with now. Then I saw a show on HGTV, House Hunters I think, that had a cat door exiting to the garage to prevent odors in the house. Well, our carport is open on three sides so this seemed illogical but the more I thought about it the more I thought it might work. My plan was in action. G made his list for a custom-built 3 x 4 foot room in the carport for the cats to use as their new bathroom.

The plan then took a detour. We happen to be shopping at Lowes and had loaded our buggy with miscellaneous items to complete the custom build but as we headed to the lumber section I noticed a large 3′ x 6′ plastic molded deck box that is air tight and has a lockable liftable lid. While G walked around pricing the lumber, I began to formulate a much easier plan. We use the deck box for the room. This was what I thought a fantastic idea but most times what occurs in my head rarely transforms into actuality. G hears me out and says “I can finish it in a day” and “that sounds good to me”. Both phrases are rarely spoken around here but we went for it. We purchased a myriad of items and our total expense totalled around $200. This sounds high but the smell is gone. The litter tracking is gone. The noise is gone. My bathroom is clean and useable and litter free. All these things are well worth the price tag.

The design is simple. The tunnel from inside the house to outside in the carport is about 10 inches long and 8″ x 8″ square.
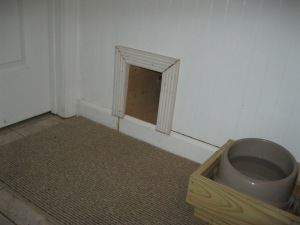
From the inside hallway.

From the inside hallway.

The tunnel connects to the outside deck box which is attached to the wall so it doesn’t shift or move when the lid is opened. Nicolas was happy to demonstrate how easy it is to access from inside the house.
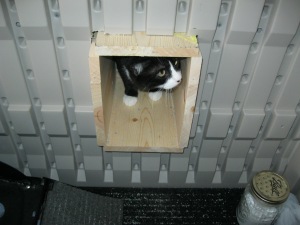
Entrance into the deck box.

Entrance into the deck box.

Once they are inside the deck box, they have their automatic litter box, indoor/outdoor carpeting, space for litter storage and a jar of baking soda for odor control. G attached a small puck light to provide a bit of ambient lighting although they can and will use it in total darkness. A bit of light gets in from the tunnel.
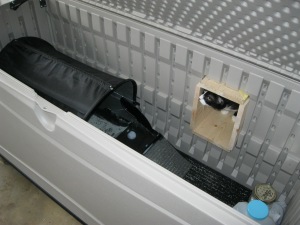
Inside view of the deck box potty.

Inside view of the decck box potty.

The lid lifts up for cleaning and to vacuum the rug if needed. We place a small wood plate over the interior access tunnel so the boys don’t have access while G is cleaning the box. The deck box comes with a recessed locking clip so all we had to buy was a pad lock with double keys. A small hole is drilled into the back of the deck box and then sealed with Great Stuff so we could plug in the automatic litter box to the outlet in the carport. A very simple installation considering what we had originally had planned and a bit more expensive but the time saved and the functionality has proved to be a great investment. Here is a pic of the box closed from the carport. Just another storage box for the untrained eye.
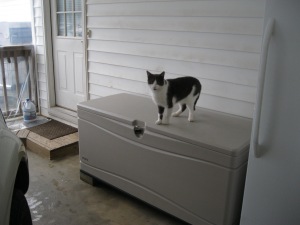
Howie loves to lay on the box...he must wonder what that noise is inside!

Howie loves to lay on the box…he must wonder what that noise is inside!

G and I agree that this is the best money we have spent on the cats by far and can’t believe we didn’t think of it sooner!
The Wrap-Up

We had a very busy year this year but the end was by far the busiest.  I started making my Christmas plans around mid October and thought I was sitting pretty with my well laid out agenda.  Of course I had to change things up as I went along and by the end of October I had made the rash decision to make Christmas ornaments, Christmas gifts and birthday presents.  I know…I must have had too much “apple cider” or something because I am usually steadfast in my plans and try not to deviate unless it’s a life or death situation.

The first errant decision was to sew felt ornaments with no “chokable” pieces so that if my brood decided to climb the Christmas tree it would not inflict too much harm on anybody that perhaps chewed or devoured one of said ornaments.  I hand stitched every single one and in the end wound up with 70 assorted ornaments to decorate our new Christmas tree.  After about eighty hours of creativity, my little munchkins barely noticed all my hard work.  Not one single ornament met a catastrophic fate.  That was great in itself but had I known they would pay little attention to a Christmas tree I would have never spent every waking moment making “New” Christmas ornaments.  Keep in mind that during this time we make our second rash decision…make not buy quilts for both sets of parents for Christmas.  So here is a pic to illustrate my fabulous craftiness!

Christmas Tree w/handmade felt ornaments and stockings!

So on to the second decision…the handmade quilts.  We decide that everything we see in the stores is not what we want.  We want patchwork like the quilts Granny used to make.  So we head out to JoAnn’s to get all the necessities we need to quilt like a pro.  We spend hours in this store and make at least 10 trips to get all we need or forgot.  Greg does most of the sewing of the patches and then we set out in search of a quilt rack.  Little did we know that those things cost hundreds of dollars and require a spare bedroom to set up.  So my honey does what he does best…he built one out of pvc pipes and imagination!

The Quilt Rack!

 
It looks like a mess but it functioned perfectly.  The only problem was that it took us 2 hours to finish one square of the quilt by hand.  There are about 100 squares on each for a total of 200.  No way were we going to be able to finish both quilts by Christmas.  So we dismantle the rack and chunk it outside to the deck.  Now what?  So we read on the web that it is possible to sew a quilt with a machine if you have two people to handle the material.  So we start machine quilting after the layers are secure with thousands of straight pins!  Rolling, tucking, switching sides and back again.  Each line in the quilt requires these steps and whoever sews then the other has to push and pull the fabric.  As it turns out, Greg sews the first and I guide the quilt and then we switch.  I must admit that I hate to sew but in this instance I was more than glad to be sewing rather than wrestling the material!  Every hour we are home we are sewing.  Day and night, weekday and weekend.  We finally finish the last one around 1am on Christmas morning!  They aren’t perfect but they are made with love and that makes them beautiful in my book!  
 

Greg can do ANYTHING!!!

 
And for the record, they were both well received.  Unfortunately, in my joy that we actually managed to finish both quilts, I forgot to make a pic of the finished quilts.  But as you can see, the colors were jewel tones leaning toward fall/winter colors and the fabrics were everything from calico cotton print to red corduroy and tweed suit material.  I was so happy with the overall look of the finished quilt.  But don’t think we are out of the woods yet!  During this time falls Diane’s and Hope’s birthdays.  Hope had picked out her gift so we were set on that front but we had come across the plans for a nativity scene which Greg’s mom had wanted for years.  She had bought the pattern and Greg had taken it to build for her but after three or four years he just had never gotten around to doing it.  So in the midst of the Christmas ornament/quilting bee turmoil he decides to build the set.
 
He patiently cuts out the pattern and traces it onto a huge sheet of plywood.  Of course he just must have a new tool for this project so we head to HD for yet another project and supplies.  Lumber, plywood, paint and the indispensible router cutter thingy.  He cuts out the pieces and we spend all day the Saturday after Thanksgiving painting and finishing the nativity scene.  Now in all those trips to JoAnn’s I forgot to get the trim to make Joseph’s head-piece so back we go for the final pre-Christmas shopping event.  In the end, turned out great and his mom was so happy to finally get her nativity set. 
 

The Nativity

  
We finished all our projects along with some last-minute things like roasting 25 pounds of peanuts for 100 employees and gift bagging them and wrapping presents for everyone and hooking up heat lights for all the outside critters and let’s see….I think that’s everything!  We were so busy it seems like a blur but we had a great time, learned tons about quilting and jigsawing and cooking and we are so thankful that it all came off so well.  We wrapped up our year with time together (the best present of all) and good times with friends and family.  Next year we are going to the beach!


Dinner is Served!

 
Recently, Tyler came over to cook dinner for us.  He had the free reign to make whatever he wanted so long it wasn’t something I couldn’t eat.  So he and Greg head to the grocery store for supplies.  After what seemed like forever, they were home and so we started dinner.  Greg was otherwise occupied so I helped Tyler with his masterpiece.  The menu was grilled chicken with grilled peaches, grilled corn and vegetable kabobs.  Sounded delicious so we dug right in.  I showed him a new technique I had learned on Food Network.  By using a heavy saucepan to beat the chicken into thinner cuts, the chicken will cooked faster and more evenly especially on the grill.  He was laughing at my method but it worked and we still talk about how to prepare chicken to be grilled.We chopped zucchini, squash, and bell peppers both red and green.  After a time-consuming session of skewering the veggies, everything was ready for the grill.  He stood out there and grilled like a pro.  The peaches that were on the menu turned out to be nectarines as they were in season and looked better at the grocery store.  Ty sliced up the nectarines and put those on the grill as well.  Now I was skeptical because I notoriously don’t like grilled fruit but these things were better than pie!!!  So warm and sweet and absolutely perfect with the garlic grilled chicken.  So we finally got to sit down and eat his gourmet meal and I have to say it was fabulous!  So tasty and a very healthy menu to boot.  I was so proud of him even if it did take almost an hour and a half to prepare the meal.  It was great and I can’t wait for his next culinary adventure! 

Here’s a pic of his creation….makes me hungry just looking at it!


So tasty!!!


One Super Cool Science Project!

Ty's Science Project...Cell Anatomy

I am so proud of my nephew words cannot express how amazing he is.  I debated posting pics of him or his name but I have decided that he is too special to leave off my blog.  This was a science project from back in October.  I of course got carried away with it as usual but he presented the cell model and received a 98 for his efforts.  It is made of cookie dough, Star Burst chews, Nerds and Sweet Tarts.  How cool is my nephew!!!

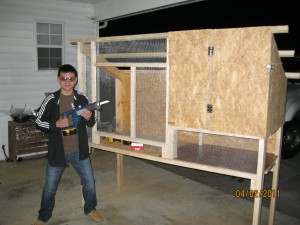
The Temporary Coop

This is Greg’s temporary chicken coop to house the newbies until they are ready to join the flock.  It turned out pretty good considering it’s mostly scrap lumber and parts from previous projects. 

Temp Coop with Handy Ty

My New Range Hood…I love, love, love it!!!

My dear hubby finished installing my new range hood last night or should I say around 3am this morning and I must say I can’t stop looking at it.  It’s gorgeous and contemporary and I just love it!  It took a little over eight hours to install but I think it makes my whole kitchen look completely different.  It gives definition to the kitchen and makes the dining room look larger.  I have wanted one of these island hoods ever since we built this house but the cost was just so outrageous we never thought we could afford one.  We had decided that when a new stove was needed we would just get the one with the built-in exhaust fan but that meant a cabinet redesign so that too was out of the question.  I started to watch the home improvement stores for sales or discounts and Home Depot came to the rescue.  The sale was on and it was the right size so we bit the bullet and put in our order.

My island range hood arrived exactly a week later and Greg picked it up ready to install and cook!!!  Unfortunately, someone had forgotten to pack the hardware pack with the hanging screws and such so Greg gets on the phone and blesses out the poor girl at the Home Depot.  She says they will order the missing pieces and call us when they come in.  Instead, Greg makes her look up the installation manual (also missing) and read out the entire parts list so he can go buy it at Lowe’s the next day.  She did and he was off with the installation.  After some “disagreements”, he installed the whole thing without any help (thus the eight long hours) and it looks amazing!  I am so proud of my hubby.  I can’t stump this man…he can do ANYTHING!!!  So with my range hood story told here is a pic of my newest appliance and a fine example of my hubby’s fantastic skills!!!

My New Range Hood...Love It!!!

Valentine’s Day

With only a few days before they were due, my hubby explains that his company was providing Valentine’s Day cards to folks who happened to be laid up in the hospital during the love holiday.  The rules were simple.  They must be homemade and they had to relate to his company’s products with their company name included.  After an initial thought of construction paper and markers, an easy way out I admit, I decided to do something a bit more “involved”.  After some quick planning, I take off to Michael’s for supplies and am rewarded with many choices.  My core concept was simple as well.  A woven paper heart with a hang tab and a simple verse.  Scrapbooking supplies served to be the best option for my idea and I got lucky that they were selling huge books of paper for half price.  Some glitter stickers cut into hearts to hold the hang tab and some colored markers to write the verse and I was set. 

After a few tries, I figured out the trick to weaving paper.  The process moved quickly and before long I had over thirty different patterns woven and ready to be cut.  Another day of cutting and glueing resulted in thirty-six beautiful handmade heart valentine’s to which I received raves for my “creativity” in incorporating the theme of hubby’s company into my creation.  I was so proud of my handiwork and Greg just beamed at my hard work.  He carefully transported my cards to work on the dreaded due day and everyone was so impressed with my idea and implementation.  All agreed that they were the best ones submitted and I had delivered a great project reflecting the company and their core products.  I was so excited that my project was well received and the best part was that the owner of the company is still talking about my “hearts” and how I had not disappointed the company’s expectation of me.  Talk about getting a big head.  I was so proud of myself and so happy that I had come through in the clutch for my dear hubby.  My goal in life is to make him proud and I think I succeeded!  What a great Valentine’s Day!

The Hope Chest

While Greg and I were still just babes with googly eyes for each other, he built me a beautiful hope chest to store various girly bits and someday a wedding dress.  After we married, I moved in with Greg and of course had my hope chest in tow.  For years it held my wedding dress and veil as well as some handmade aprons my granny made before I was even born.  It served as storage, a seating bench, and a coffee table with equal aplomb.  It has just always been there in some capacity.  Then last year in my need to declutter and organize my house I banished my treasured hope chest to the storage building.  I relocated my wedding dress and packed away my other mementos in favor of added space and less clutter. 

Last week, Mom finally decided to take my sewing table to put in her sewing room leaving my dining room with a huge bare wall.  Now Greg says that’s okay but of course I say something has to fill the space.  So he trudged out to the storage building and lugs my beloved hope chest back into the house and places it ever so begrudgingly in the vacant space under my teapots.  “Now what” he says and the gears begin to spin and a new project begins to take shape.  A seat of course but this time with a handsewn cushion and pillows to match.  Wait, it must be painted too but that’s a huge commitment since it remains just as Greg built it all those years ago.  So the search is on for a new finish that will not tarnish the wonderful memories that it holds.  I am entertaining the idea of red…everyone knows a red dining room is sexy and seductive so if I can’t put red everywhere why not on my hope chest and pillows.  Of course when gears in my brain turn other gears turn as well and now I think the kitchen needs a pop of fresh color and maybe a new rug and perhaps a…….

Post Navigation